My go-to vanilla pattern has a flap heel, though in college I did some experimentation and went through a period where all of my socks had garter stitch short-rowed heels. (Isn't that what college is about? Experimentation?) In any case, after college (like so many other girls) I went back to my standard flap heel.
If you listen to the podcast, you've heard my mom rave about how addictive afterthought heels are. If you're me, you hear it even more frequently. Like so many other things, her suggestion worked its way into my brain, and I succumbed to peer pressure. I started a pair of beautiful socks (out of Abstract Fiber's Temptation in "Snapdragon") with the express intention of finding out what all the hubbub around afterthought heels was about.
We were watching TV (The Good Guys, my current favorite show), and I decided to take pictures with my phone and tweet my progress.
 |
| This is my sock, with the waste yarn placed where the heel should go, 7 inches in. Dog sleeping in background is not necessarily necessary to execute an afterthought heel, but is a snuggly option. If allergic, feel free to substitute with a cat. Or goldfish. |
9.25 - 2(1.75) = 5.75 (<- total length of the foot in inches, pre-toe)
(Do you get as excited about order of operations as I do? I'm going to assume so.)
Next, it's time to pick up stitches:
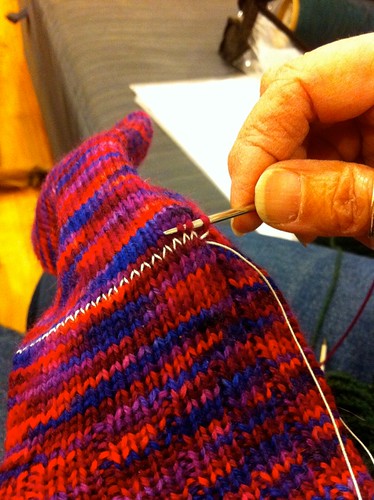 |
| Next step: Pick up stitches on either side of the waste yarn- or in this case, crochet cotton. |
Now comes the fun part. Mom says that if the waste yarn is slick enough, you can just slide it out. (I'm using mystery crochet cotton, since I'm pretty sure that Herself walked off with my sweet skein of beautiful, slick crochet cotton. She'll deny it, but I have my suspicions.)
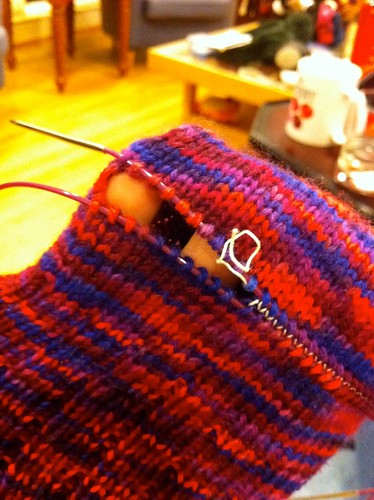 |
| Next step: Unpick/slide out your waste yarn. Bonus points if you pretend you're a surgeon, since removing stitches is pretty much the same regardless of your subject. |
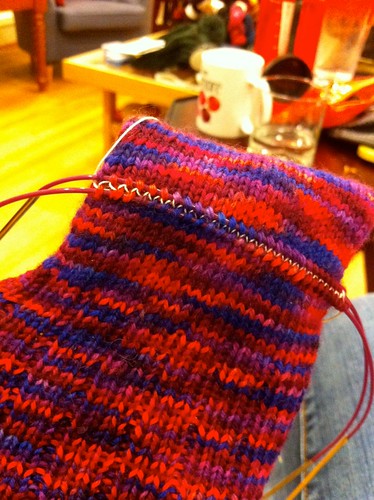
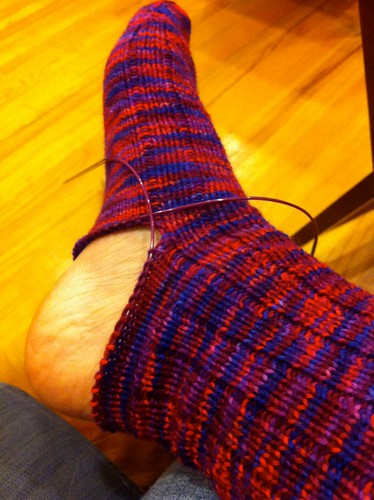
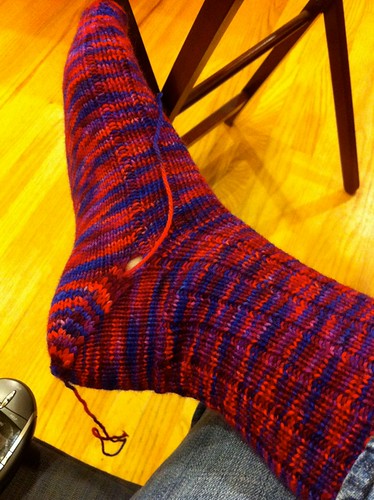
From here, knit a toe the way you normally would. Use your best kitchener stitching skills on those final remaining stitches, and voilà!
So, there is a teeny-tiny hole at the side, but you'll notice the conveniently located tail, which I'll be using to close the hole before I weave it in.
And on that note, I'm going to go and start the second sock while the spirit moves me.


I made my first afterthought heel recently after being inspired by Gigi and it worked great! Thanks for the mini tutorial - now I just need to make sock number two!
ReplyDeleteSo you told that heel to toe the line. I see.
ReplyDeleteWell shown and said. Thank you. It's almost like magic. I may just have to try this.
ReplyDeleteI can see using it when I am doing social knitting and therefore would need to change to another project when the heels happen as I have experienced the results of social knitting and making heels to my sad detriment.
Namaste
Oh...my..(fanning myself furiously).. I HAVE to try that!
ReplyDeleteAfter listening to you talk about it on the podcast, now I totally get it! I MUST try this. Thank you for the tutorial!
ReplyDeleteW00t - changing it up! Nice photo essay and v. encouraging to any knitters who might be stuck in a rut. Hmmmm... what can I change up today?
ReplyDeleteOrder of Operation is Happy-Bum-Dance Worthy. Especially when applied it results in Cheesecake before Temptation and Vanilla Socks. Even as an Afterthought, there was dessert, so the terrorists were defeated.
ReplyDeleteLooking good! Usually when I do an afterthought heel I pick up 1-2 stitches in the "gap", and have never had a little hole as long as I remember to pick those stitches up.
ReplyDeleteGreat little tutorial, and timely too! I've been itching to try this since listening to Gigi wax poetic about the afterthought heel. Thanks for sharing!
ReplyDeleteYay, order of operations! woo-hoo! :)
ReplyDeleteMy dh and kids always wear through their socks at the heels, so out of necessity, I have been using the afterthought heel for quite a while. It is so gratifying to be able to replace a heel quickly and easily. I knit my socks toe up- it works both ways. Welcome to the dark side!
ReplyDeleteI must admit, not only when I've done afterthought heels, but also when putting thumbs on fingerless gloves, I have very slowly and carefully pulled out the waste yarn, slowly picking up each stitch as I went along. 9 times out of 10 I got them on the wrong way and it takes forever.
ReplyDeleteThanks for showing the error of my ways!
Thanks for the great tutorial. Just one question: How did you determine the length of the heel? Did you measure the heelflap of a "standard" sock?
ReplyDeleteThis is interesting, but I am not sure I understand why the length of TWO toes is required to work this type heel. I don't remember EZ instructing us thus... will listen to podcast and see if Gigi provides more info.
ReplyDeleteBTW, been trying to get to you with IMPORTANT information via email and Rav for several days! Please check your email. Has to do with a certain Christmas present you wanted to give someone.... Elaine
I have got to try this, as I seem to wear through my heels way too quickly! I will be casting on this week and will show them off soon I hope.
ReplyDeleteOkay, I totally get the math on a toe up sock, but my brain is fluffing on trying to figure out where to place the marker row when it's a top down sock. Normally I like a little stockinette below where I stop the pattern in the back-half of my sock, so would I just put that marker row in below the stockinette?
ReplyDeleteHi! This is fantastic! Thank you!
ReplyDeleteSo how did this toe on the heel fit? I like heel flaps and am curious to know how this compares fit-wise. Love the podcast!!
ReplyDeleteMelinda